Article Hero Image

The macOS Sonoma beta is tantalizing — until you find a show-stopping problem with your workflow. Here's how to go back to macOS Ventura.
At least tell us you backed up your Mac before you installed the macOS 14 beta. If you didn't, then the odds are that you'll be best off sticking with macOS Sonoma instead of trying to downgrade.
That's because downgrading requires you to wipe your Mac entirely. So you could do that and then reinstall your apps and documents, hoping that everything is in iCloud, but at best it would be slow.
Even if you do have a backup, you're not going to switch to macOS Ventura in five minutes.
But if you must downgrade from the macOS Sonoma beta, the most straightforward way is to erase the Mac, and then start from scratch in Recovery Mode.

How to uninstall macOS Sonoma on Apple Silicon Macs
- Shut down the Mac
- Restart the Mac by pressing and holding Power (on Intel Macs, press Power, then hold Command-R)
- On the screen that eventually appears, choose Options and click Continue
- When prompted, enter the password for your user account
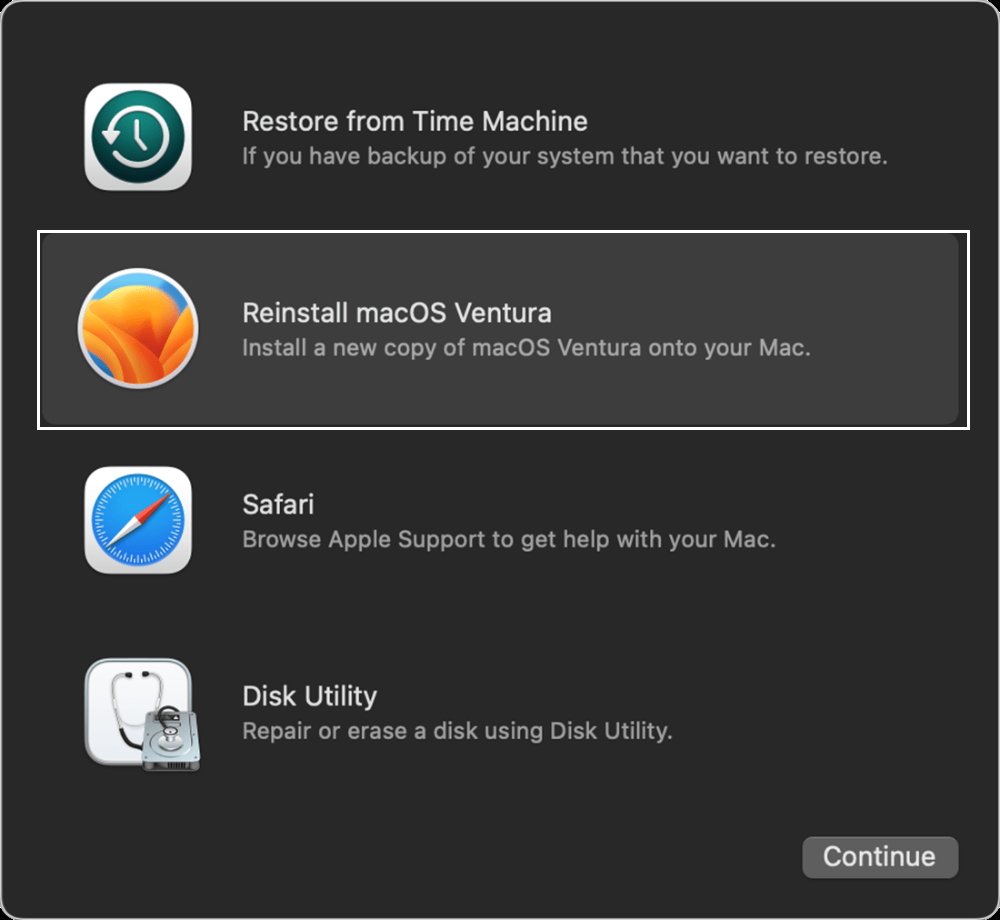
- Do not choose the reinstall macOS option when offered
- Instead, click on Disk Utility, and then Continue
- Choose the very top level of the hard drive displayed, then click Erase
- Enter a name for your Mac and click the new Erase button
- Confirm — twice — that you are certain you want to do this
- When prompted, choose a Wi-Fi network for the Mac to join
- After a moment, your Mac is activated and you can click Exit to Recovery
- Now choose Reinstall macOS Ventura

This will download a copy of macOS Ventura and install it. Note that it's approximately a 12GB download. So, depending on your internet connection, this could even take a couple of hours.